Radikally Different - Our World View
Easy Recording of Your iPhone, iPad or iPod Touch Screen with QuickTime
Recording the screen of your iPhone, iPad and iPod Touch is simple and does not require the assistance of any jailbroken apps or third party apps. Thanks to iOS 8 and OS X Yosemite. Apple has extended its support of this feature to QuickTime, making it possible for developers to get a powerful video demo of their apps or games and not just working with static screenshots.
To be able to record the iPhone, iPod Touch or iPad screen on a Mac, you should essentially have OS X Yosemite and iOS 8 running on the devices.
After connecting the iPhone or iPad or iPod Touch to the Mac with a Lightning cable, you need to open QuickTime and choose File > New Movie Recording from the menu bar. In case, you want to use the keyboard shortcut, use Option-Command N. Next a new QuickTime window for video recording will open. Please note that as a default action, QuickTime will activate your Mac’s iSight camera. However, you need to ignore it and instead look at the small arrow like dropdown menu next to the record button. Clicking on that arrow will present an alternate recording source i.e your iPad, iPhone or iPod Touch. Choose accordingly.
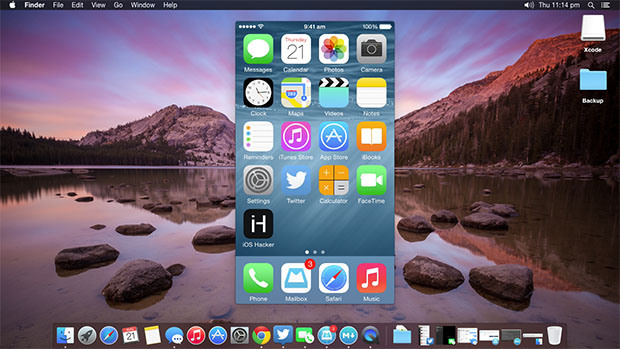
After selecting your iPad or iPhone or iPod Touch you will be able to see the device’s screen replica in the QuickTime window. You will be able to see an exact iOS status bar with a full battery, cellular reception and time setting, thereby, making the iPhone’s recording appear just like Apple’s.
Also if you cause a rotation to your device, the QuickTime recording will be able to recognize that as well. Upon this you will see the preview window on your Mac switching aspect ratios. Even when you will tap on or swipe across your iOS device, you would see the action on the Mac getting recorded.
This recording is almost real-time; however you are likely to notice a lag between performing an action on device and viewing it on the QuickTime window. However, actual iPhone recordings will not encounter any problem because the software will sync the video and audio in the final version.
You can either first record the iPad, iPhone or iPod Touch screen and then add the audio, or record audio live with video. This too will involve the same drop-down menu along with your preferred source for audio.
Finally press the stop button on the preview window after you have completed the recording. Once finished, save the video as a QuickTime movie on your computer.
- Augmented Reality (4)
- Enterprise (9)
- Games (15)
- Marketing (17)
- Mobile App Development (26)
- Mobile Apps (19)
- Mobility Solutions (1)
- Monetization (8)
- News (16)
- Remote Hiring (1)
- Strategy (13)
- Testing (7)
- Uncategorized (1)
- User Experience (8)
- Virtual Reality (4)
- Web Browsing (1)
- Web Design & Development (20)